
Table of Contents
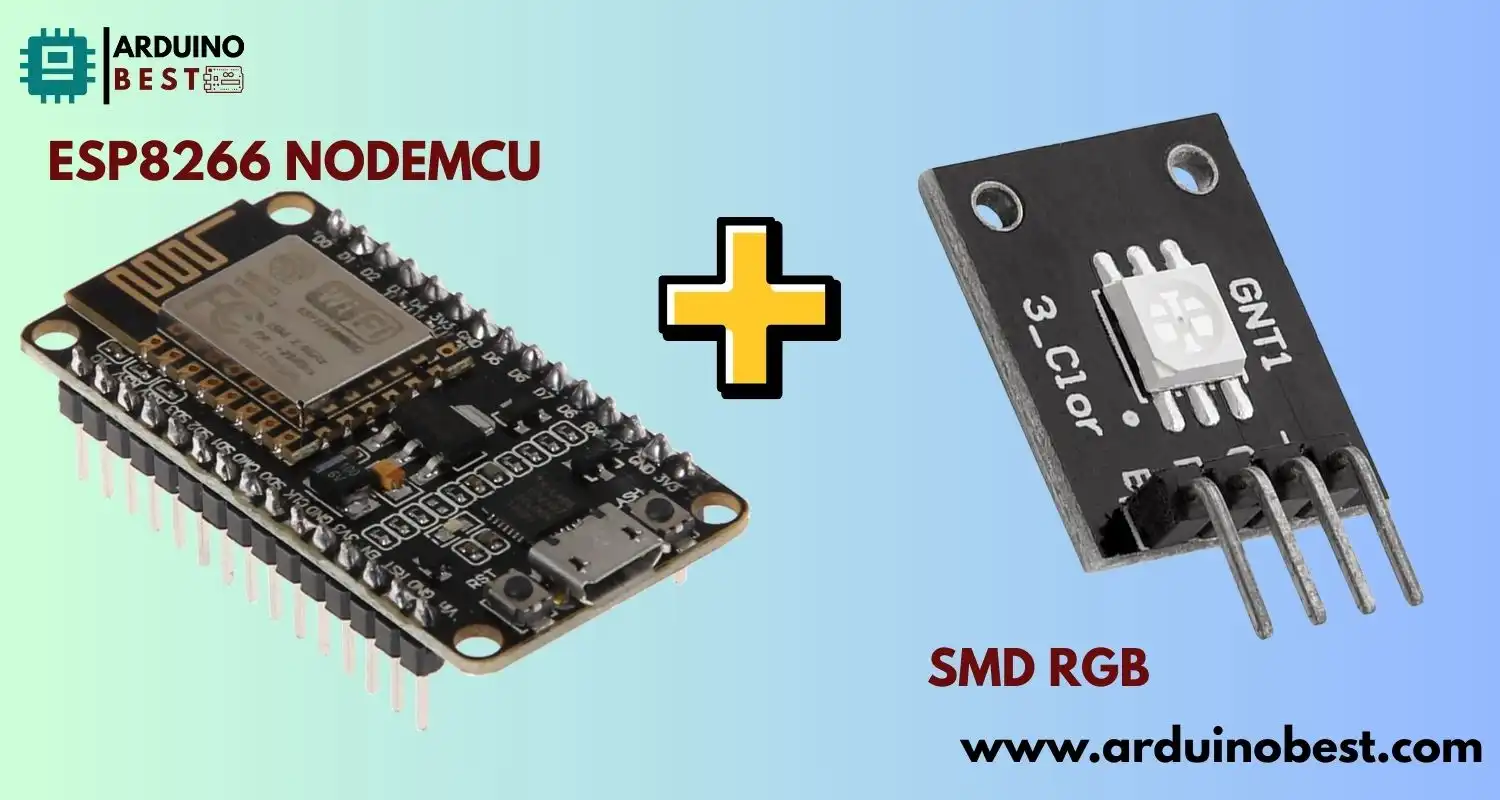
In the world of IoT and DIY electronics, few components are as versatile and popular as the ESP8266 NodeMCU with SMD RGB LEDs, it opens a world of vibrant possibilities—from mood lighting and interactive art to smart home ambiance.
Whether you’re a beginner or a seasoned maker, this guide walks you through setting up, programming, and expanding your ESP8266 NodeMCU with SMD RGB system.
What is ESP8266 NodeMCU and Why Combine it with SMD RGB?
The ESP8266 NodeMCU is a low-cost Wi-Fi-enabled microcontroller, ideal for building wireless, internet-connected projects. Meanwhile, SMD RGB LEDs are compact, surface-mounted diodes capable of producing millions of color combinations through red, green, and blue light.
Together, they form a powerful pair that enables:
- Dynamic lighting systems
- Remote-controlled LED displays
- Custom web interfaces for color control
- Integration with home automation
You can explore a similar setup in this excellent ESP8266 RGB Color Picker Tutorial, which shows how to build a web interface to control your lights.
Why Use SMD RGB with ESP8266?
SMD (Surface Mount Device) RGB LEDs have become a go-to for makers due to their:
- Compact size and easy integration
- Brightness and energy efficiency
- Ability to be addressable (like WS2812B) or non-addressable
The ESP8266 NodeMCU, with its multiple GPIO pins and Wi-Fi capabilities, provides a seamless way to control these LEDs from a smartphone, computer, or over the cloud. If you’re just getting started, check out this LED tutorial for Arduino and ESP8266 for foundational knowledge.
Components Required
To build your ESP8266 NodeMCU with SMD RGB setup, you’ll need the following components:
- 1x ESP8266 NodeMCU board (e.g., Amica or LoLin versions)
- 1x SMD RGB LED (common anode or common cathode)
- 3x 220Ω resistors (for each RGB pin)
- Jumper wires
- Breadboard or PCB
- Micro USB cable
- Power source (5V USB or battery pack)
Optional for advanced use:
- WS2812B addressable LED strip
- Capacitors (for current stabilization)
- Logic level shifter (if using 5V logic components)
Wiring the ESP8266 NodeMCU with SMD RGB
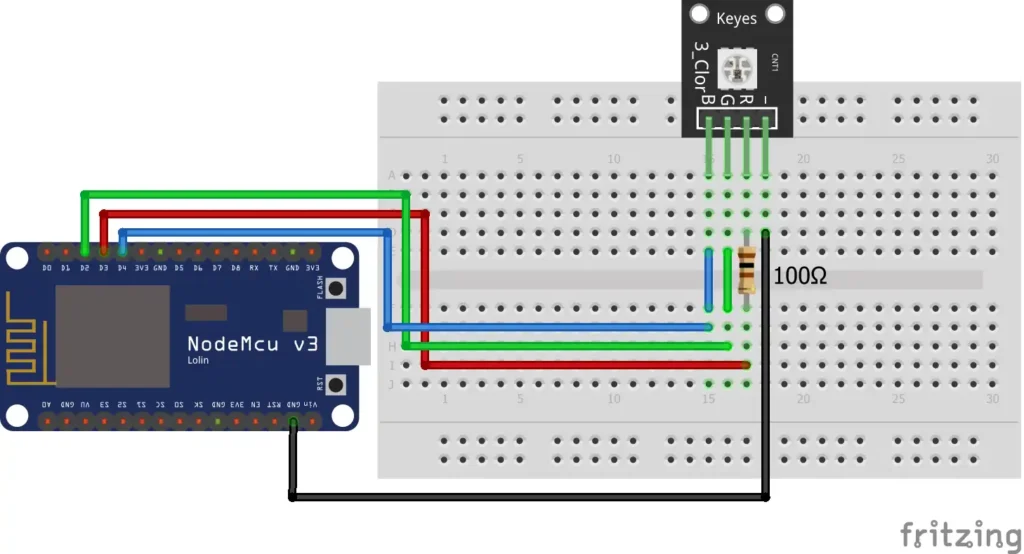
Here’s how to wire a common cathode SMD RGB LED to the NodeMCU:
- Connect the cathode (common ground) of the LED to GND on the NodeMCU.
- Connect the red pin to D1 (GPIO5) through a 220Ω resistor.
- Connect the green pin to D2 (GPIO4) through a 220Ω resistor.
- Connect the blue pin to D3 (GPIO0) through a 220Ω resistor.
This simple circuit allows you to use PWM (Pulse Width Modulation) to mix colors and create smooth transitions.
Setting Up the Development Environment
To begin programming the ESP8266, set up the following:
- Install Arduino IDE if not already installed.
- Add ESP8266 board support by navigating to: arduinoCopyEdit
File > Preferences > Additional Board Manager URLs: http://arduino.esp8266.com/stable/package_esp8266com_index.json - Open Boards Manager, search for “ESP8266”, and install.
- Select “NodeMCU 1.0 (ESP-12E Module)” from the board list.
Writing the Code to Control SMD RGB LEDs
Here’s a simple sketch that fades between RGB colors:
cppCopyEdit#define RED_PIN D1
#define GREEN_PIN D2
#define BLUE_PIN D3

void setup() {
  pinMode(RED_PIN, OUTPUT);
  pinMode(GREEN_PIN, OUTPUT);
  pinMode(BLUE_PIN, OUTPUT);
}

void loop() {
  for (int i = 0; i < 256; i++) {
    analogWrite(RED_PIN, i);
    analogWrite(GREEN_PIN, 255 - i);
    analogWrite(BLUE_PIN, i / 2);
    delay(10);
  }
}
This code cycles smoothly through colors by adjusting the PWM values of each LED channel.
Creating a Web-Based Control Interface
A standout feature of the ESP8266 is its ability to host a lightweight web server.
Benefits of a Web Interface
- Control lights from any browser
- No app installation needed
- Real-time color changes
You can see a practical example in this WiFi Controlled RGB LED Strip with ESP8266 guide.
Building the Web Server
Using the ESP8266WebServer library, you can serve an HTML color picker:
htmlCopyEdit<input type="color" id="colorPicker" />
JavaScript reads the value and sends it to your ESP8266, which then adjusts the PWM outputs accordingly.
Power Considerations for RGB LEDs
RGB LEDs, especially in strips, can draw significant current. Important tips:
- Use a dedicated 5V power supply for longer LED strips
- Avoid powering high loads directly from the ESP8266
- Consider using MOSFETs or transistors to switch higher currents safely
Expanding Your Project with Advanced Features
Once you’ve mastered basic color control, try enhancing your project with:
- Lighting modes: Fade, flash, strobe, rainbow
- Remote access: Use port forwarding or cloud platforms like Blynk or MQTT
- Integration: Connect to Home Assistant or Alexa for smart home automation
Troubleshooting Common Issues
If things don’t work as expected, consider:
Wiring Problems
- Check resistor values and connections
- Confirm LED type (common anode/cathode)
Code Errors
- Use
Serial.print()for debugging - Ensure correct pin mappings
Power Failures
- Avoid drawing power for LED strips from USB
- Use capacitors (1000µF) to stabilize voltage
Frequently Asked Questions (FAQs)
Q1: How do I power a long strip of SMD RGB LEDs with ESP8266?
A: Use an external 5V power supply rated for the total LED current. Don’t power long strips from the NodeMCU directly.
Q2: Can I control individual LEDs on an SMD RGB strip?
A: Only if you’re using addressable LEDs like WS2812B. Otherwise, all LEDs in the strip will display the same color.
Q3: What is the maximum number of LEDs I can control with ESP8266?
A: For addressable LEDs, you can control hundreds, limited only by RAM and power supply. For non-addressable, limit based on total current.
Q4: How can I make my ESP8266 and LED setup portable?
A: Use a USB power bank or a 5V battery pack. Ensure the voltage remains stable, especially with multiple LEDs.
Q5: Are there any ready-made libraries for controlling RGB LEDs with ESP8266?
A: Yes! Libraries like FastLED and Adafruit NeoPixel simplify RGB control and add effects.
Conclusion
Combining the ESP8266 NodeMCU with SMD RGB LEDs offers makers, hobbyists, and IoT enthusiasts a flexible and exciting path into smart lighting and automation. With just a few basic components and a little code, you can build colorful, dynamic LED systems that respond to your commands—whether locally through physical connections or remotely via a custom-built web interface.
The true power lies in the NodeMCU’s built-in Wi-Fi, which opens the door to wireless control, smartphone integration, and even cloud-based automation. Whether you’re lighting up a room, adding flair to your workspace, or integrating with platforms like Home Assistant, this project serves as a great foundation for more advanced IoT systems.
Start small, experiment, and expand at your own pace. Try out new animations, preset modes, or even connect your lighting setup to sensors or voice assistants. With consistent testing and creative thinking, you’ll unlock features and capabilities that make your projects not only functional but also truly interactive.
Your microcontroller may be small, but with the ESP8266 NodeMCU and SMD RGB LEDs, your possibilities are anything but. Happy tinkering—and may your LEDs always shine bright and glitch-free!
Projects ESP8266 nodemcu :
1- ESP8266 NodeMCU: A Comprehensive Guide to IoT Development
2- Control LED with ESP8266 NodeMCU: A Beginner’s Guide
3- Integrating a Joystick with ESP8266 NodeMCU: A Comprehensive Guide
4- esp8266 nodemcu with Flame Sensor
5- ESP8266 NodeMCU with Heartbeat Sensor
6- ESP8266 NodeMCU with KY-027 Magic Cup Light
7- ESP8266 NodeMCU with Hall Magnetic Sensor