
Table of Contents
Introduction
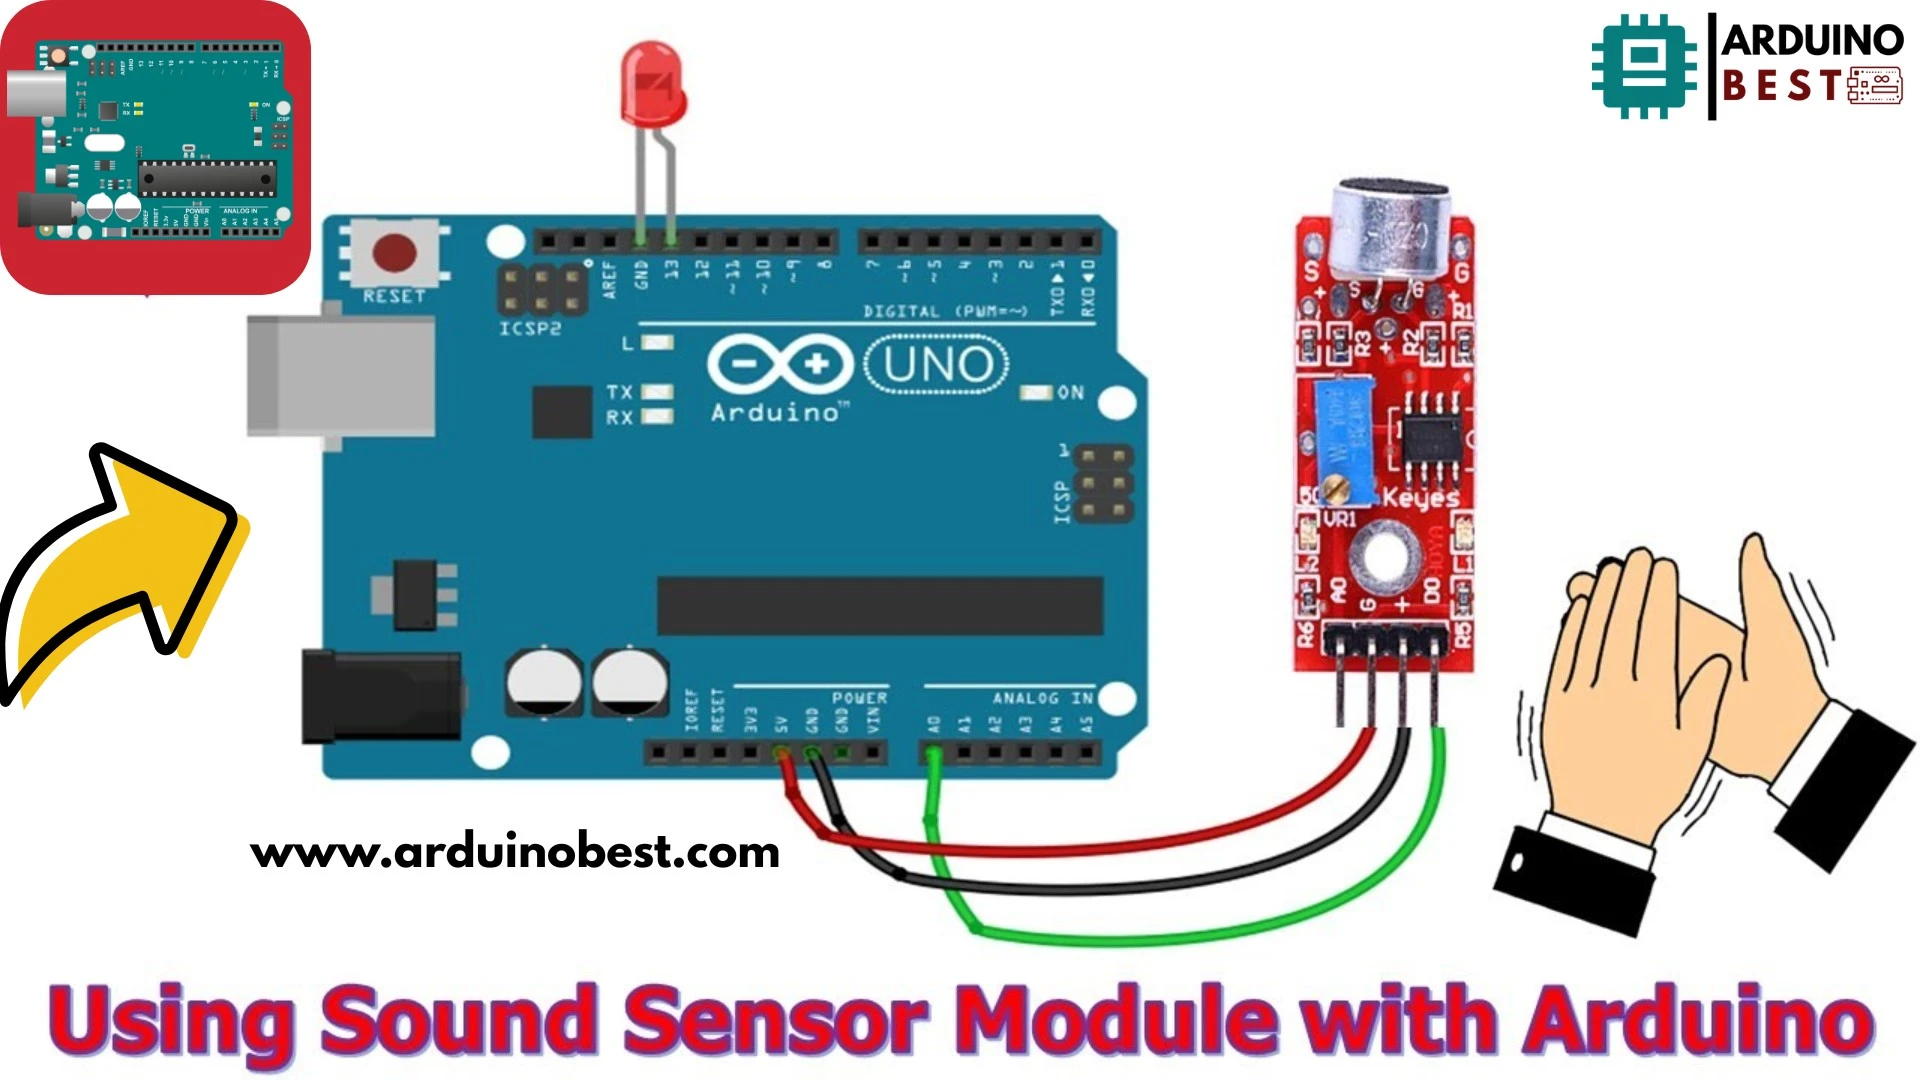
Sound sensors are widely used in various applications, from home automation to security systems. By integrating an Arduino Uno with a sound sensor module, we can create innovative projects such as clap-activated devices, noise level monitoring systems, and interactive sound-based controls. This guide provides a step-by-step approach to building an Arduino Uno sound sensor project, including circuit design, coding, calibration, and troubleshooting.
Understanding Sound Sensors
Types of Sound Sensors
- Analog Sound Sensors: Output a continuous voltage proportional to the sound intensity.
- Digital Sound Sensors: Have a threshold-based response, triggering high or low signals when sound crosses a set limit.
Working Principle
Sound sensors work by detecting variations in air pressure (sound waves) using a built-in microphone. The module processes these signals and converts them into electrical output that the Arduino Uno can read and interpret.
Components Required
Hardware
- Arduino Uno
- KY-038 or LM393 Sound Sensor Module
- LEDs (for sound indication)
- Resistors (220Ω, 10kΩ)
- Breadboard & Jumper Wires
Software
- Arduino IDE (for coding and uploading the sketch)
- Required Arduino libraries
Circuit Design and Wiring
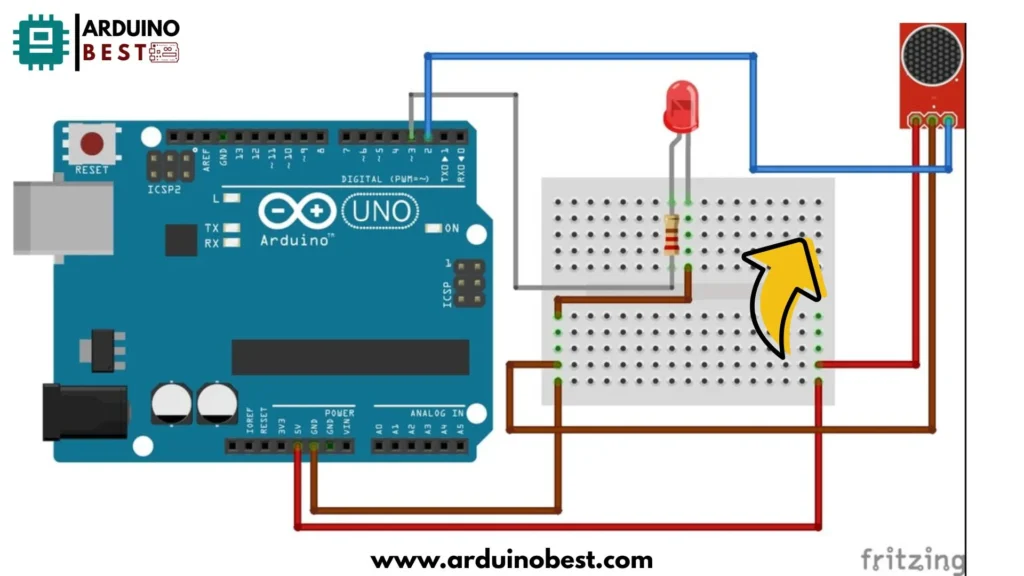
Connecting the Sound Sensor to Arduino
| Sound Sensor Pin | Arduino Pin |
|---|---|
| VCC | 5V |
| GND | GND |
| AO (Analog Out) | A0 (Analog Input) |
| DO (Digital Out) | D2 (Digital Input) |
Integrating LEDs
- Connect an LED to pin 13 to indicate noise detection.
- Use a 220Ω resistor to limit current flow.
Programming the Arduino
Setting Up Arduino IDE
- Install Arduino IDE.
- Connect Arduino Uno to the PC using a USB cable.
Writing the Code
const int LED = 3;
const int Sensor = 2;

int level;
const int threshold = 640;

void setup()
{
pinMode (LED, OUTPUT);
Serial.begin(9600);
}

void loop() {
level = analogRead(Sensor);
if (level > threshold)
{
digitalWrite (LED, HIGH);
delay (1000);
digitalWrite (LED, LOW);
}
else
{
digitalWrite(LED, LOW);
}
}
Calibration and Sensitivity Adjustment
- Adjust the potentiometer on the sensor to modify sensitivity.
- Use
Serial Monitorto observe values and set a proper threshold.
Implementing Practical Applications
Sound-Activated LED Control
- The LED lights up when noise exceeds the set threshold.
Clap-Controlled Devices
- Modify the code to recognize double claps as a trigger for an event (e.g., turning on a light or fan).
Sound Level Monitoring
- Use LCD/OLED displays to show real-time sound intensity.
Data Logging and Analysis
Storing Sensor Data
- Use SD card modules or cloud-based IoT platforms to log data for analysis.
Analyzing Sound Patterns
- Create visual graphs of sound variations over time.
Troubleshooting Common Issues
Sensor Malfunctions
- Ensure proper power supply and connections.
Electrical Interference
- Use shielded cables to reduce noise interference.
Code Debugging
- Use Serial Monitor to track sensor readings.
Enhancements and Upgrades
Integrating Multiple Sensors
- Combine temperature, humidity, and motion sensors for advanced automation.
Wireless Communication
- Implement Wi-Fi (ESP8266) or Bluetooth (HC-05) modules for remote monitoring.
FAQs
How does a sound sensor work with Arduino?
It detects sound waves, converts them into electrical signals, and sends them to Arduino for processing.
Can this system differentiate between different sounds?
Basic modules cannot, but ML-based sound classification can be implemented with ESP32.
How can I adjust the sensitivity of the sound sensor?
Use the potentiometer on the module to fine-tune detection levels.
Can I control multiple devices with this project?
Yes, you can expand the code to control relays, motors, and appliances.
What are the power requirements for continuous operation?
A 9V battery or USB power adapter can power the system for extended use.
Conclusion
The Arduino Uno sound sensor project is a great way to explore sound detection and automation. By following this guide, you can create interactive projects like clap-controlled devices, noise monitoring systems, and smart automation solutions.
External Links:
- Arduino Official Documentation – Arduino programming reference
- KY-038 Sound Sensor Module Guide – Comprehensive sensor tutorial
- ESP8266 IoT Sound Sensor Project – Wireless sound detection using IoT
Arduino Projects:
1- Complete Guide for DHT11/DHT22 Humidity and Temperature Sensor With Arduino
2- DHT11 – Temperature and Humidity Sensor
3- DHT22 – Temperature and Humidity Sensor (more accurate than DHT11)
4- BMP180 – Barometric Pressure and Altitude Sensor
5- BMP280 – Barometric Pressure & Temperature Sensor
6- BME280 – Temperature, Humidity, and Pressure Sensor
7- Arduino Flex Sensor Controlled Robot Hand
8- Arduino ECG Heart Rate Monitor AD8232 Demo
9- Arduino NRF24L01 Wireless Joystick Robot Car
10- Arduino Force Sensor Anti-Theft Alarm System
11- Arduino NRF24L01 Transceiver Controlled Relay Light
12- Arduino Rotary Encoder Controlled LEDs: A Complete Guide